
how to attach the letters logo on bags, how to install letters metal logo on leather and clothes
Metal lettering logos are a key detail in leather goods and apparel design that enhances texture and builds brand recognition. Compared to printing and embroidery techniques, metal lettering naturally features a three-dimensional texture and a luxurious metallic sheen, making it suitable for a variety of design styles, including affordable luxury, workwear, and streetwear. However, the metal lettering logo’s durability, flatness, and integrity directly determine the finished product’s quality and lifespan.
From a designer’s practical perspective, installing metal lettering logos is not a single, standardized process; the appropriate fastening method must be selected based on the properties of the base material (genuine leather, PU leather, woven fabrics, knitted fabrics), the product’s intended use, and visual design requirements. This article systematically reviews mainstream fastening techniques, breaks down standardized installation procedures, and clarifies the selection logic for different scenarios, providing a practical foundation for the implementation of apparel and leather goods designs.
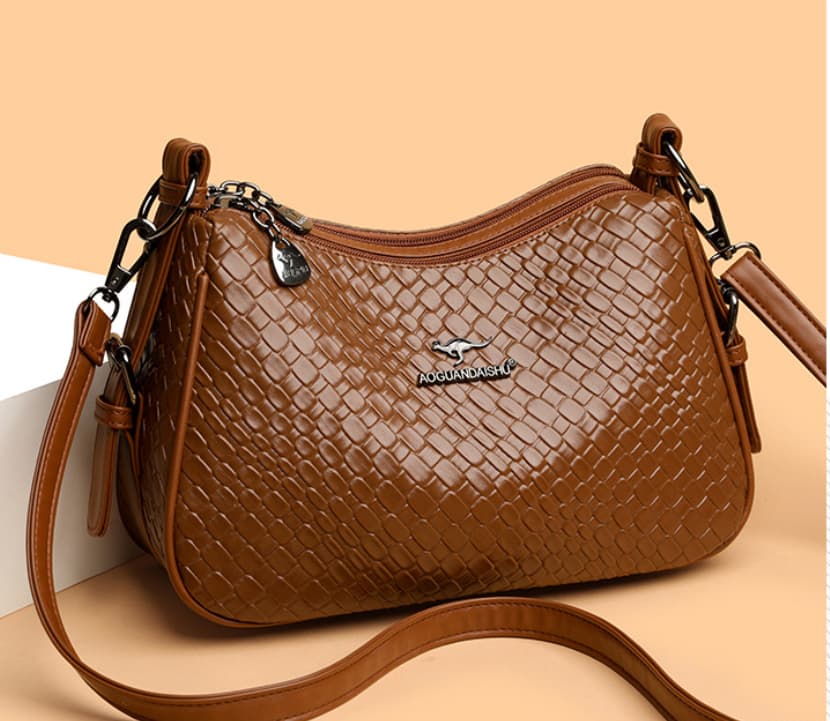
Classification of Mainstream Attachment Methods for Metal Letter Emblems
Currently, three major categories—mechanical attachment, adhesive attachment, and auxiliary attachment—cover the six common methods for attaching metal lettering logos to leather goods and clothing. These methods serve different materials and design needs, and they vary significantly in durability, aesthetics, reversibility, and cost—factors that designers must weigh carefully during production
Classification of Mainstream Attachment Methods for Metal Letter Emblems
Currently, three major categories—mechanical attachment, adhesive attachment, and auxiliary attachment—encompass the six common methods for attaching metal lettering logos to leather goods and clothing. These methods accommodate various materials and design requirements. These methods differ significantly in terms of durability, aesthetics, reversibility, and cost, making them key considerations in the implementation of designs.
Mechanical Punching and Fastening
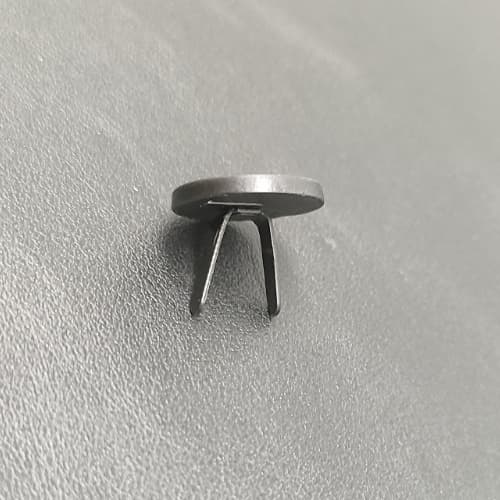
This category represents the mainstream process for hard substrates, relying on physical piercing and interlocking to achieve fastening. It offers exceptional stability and is suitable for luggage and thick leather goods. It includes three sub-processes: hollow claw fastening, solid rivet fastening, and screw-and-nut fastening.
Claw-type fastening is a lightweight mechanical fastening method. The back of the metal lettering logos features an integrated four-claw or two-claw pin, requiring no additional accessories and offering convenient operation. It is suitable for medium-to-thin leather and rigid fabrics. Solid rivet fastening offers greater load-bearing capacity. The rivet deforms under pressure to interlock with the substrate, providing excellent wear resistance and tensile strength; it is commonly used in high-end, heavy-duty leather goods. Screw-and-nut fastening is a removable mechanical fastening method that delivers a high degree of flatness and a seamless, premium finish, making it ideal for light luxury and high-end custom applications.
Adhesive Bonding and Fixation
This non-perforating, non-destructive process uses specialized adhesives to bond letters to the base material. Its greatest advantage is that it does not damage the texture of fabrics or leather, preserving the material’s integrity. It comes in two forms: single-sided adhesive backing and liquid adhesive bonding, and is suitable for lightweight fabrics, high-quality genuine leather, and garments that cannot be perforated.
This process offers relatively poor resistance to washing and bending. It cannot withstand frequent friction or outdoor conditions, so manufacturers mainly use it for decorative, light-luxury items that remain static during wear.
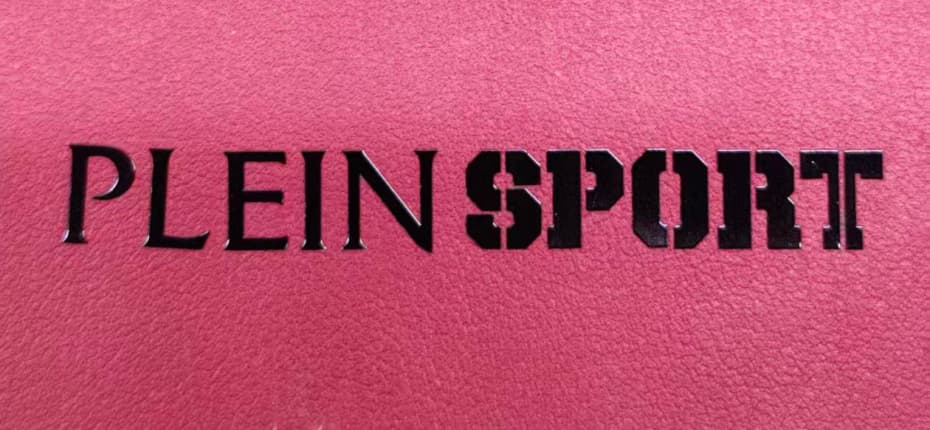 | 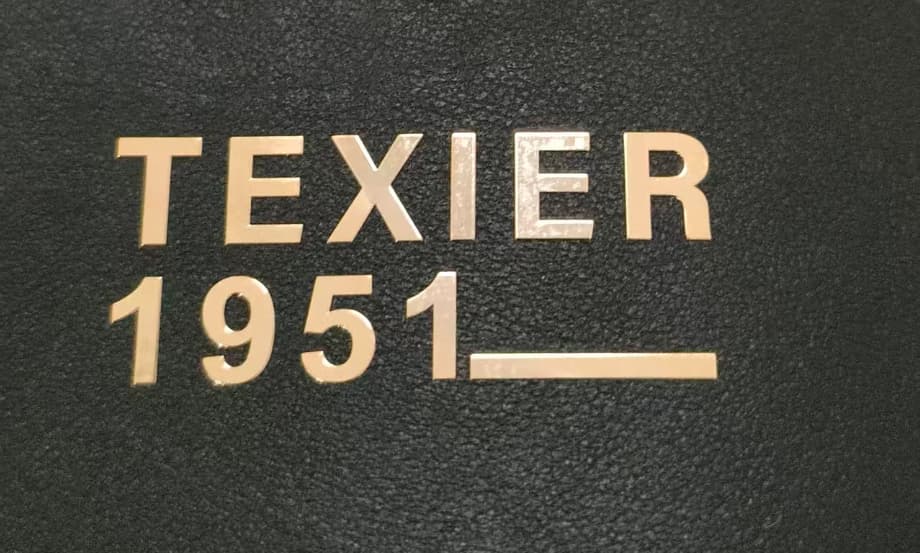 |
Standardized Installation Processes for Different Mounting Methods
To facilitate quick identification and selection, we first present a summary table that clearly illustrates the key differences among various mounting methods, covering compatible materials, key advantages, limitations, and applicable scenarios—all at a glance.
| Fixed Process Type | Compatible Substrates | Core Strengths | shortcomings |
| Claw-Nail Fastening | Medium-thin leather, canvas, and Oxford cloth (1.0–3.0 mm) | Easy to operate, highly efficient in mass production, low-cost, and moderately durable | There are raised claw-like studs on the back; the surface is somewhat uneven, and prolonged bending may cause them to come loose. |
| Secured with solid rivets | Thick genuine leather, heavy-duty fabrics, and rigid luggage materials | High tensile strength, washable, bend-resistant, and extremely durable | The process involves many steps, which leave permanent marks and make it impossible to disassemble |
| Workwear Bags, Durable Outdoor Apparel, High-End Heavy-Duty Leather GoodsFastened with screws and nuts | High-end genuine leather, rigid, affordable luxury leather goods | No visible seams on either side, high flatness, and removable and replaceable | High precision requirements, cumbersome operations, and relatively high costs |
| Adhesive Bonding and Fixation | Lightweight knits, silk, premium genuine leather, thin PU leather | No drilling, no damage to the substrate, and a smooth, refined finish | Poor resistance to washing and abrasion; tends to delaminate at high temperatures |
| Magnetic, Non-Destructive Mounting | All fabrics, lightweight leather goods, and high-value ready-to-wear garments | Can be repeatedly attached and removed, causes no damage, and is versatile and easy to pair with anything | Moderate durability; not suitable for high-friction applications |
Fastening techniques differ greatly in operation, tools, and results, so designers must master key steps to avoid curled edges, misalignment, detachment, and fabric damage, ensuring the product’s fine details and texture
Claw Nail Fastening Process (General-Purpose)
This process is suitable for leather, canvas, and Oxford cloth with thicknesses ranging from 1.0 to 3.0 mm. It is the mainstream method used in the production of affordable luggage and casual apparel, offering low tooling requirements and high efficiency.
First, mark the positioning points on the base material surface according to the pin locations of the metal lettering logos. Use a punch of the same specification to drill holes vertically, ensuring the hole diameter precisely matches the pins to prevent the letters from becoming crooked due to oversized holes. Next, place the letters on the front side and insert the claw nail pins through the holes from the front, ensuring the letters lie flat against the base material surface without any misalignment or curling.
Finally, secure and shape the letters from the back. Lay the base material flat on a rigid backing board, spread open the metal claw pins on the back, and gently press them down with a flat-headed hammer or crimping pliers to ensure the claw pins adhere evenly to the back fabric, preventing localized bulges. After completion, gently pull on the letters to test their firmness and ensure there is no looseness.
Solid Rivet Fastening Process (Heavy-Duty, Durable Version)
Suitable for thick genuine leather, workwear and luggage, and outdoor abrasion-resistant apparel, this method offers far greater strength than claw nails. It resists washing, bending, and tearing, and is designed for long-lasting durability.
Step 1: Precise Alignment.
Align the metal lettering logos with the rivet holes and select solid rivets of the appropriate length. The rivet length must match the total thickness of the leather, allowing for a 1mm allowance for compression deformation.
Step 2: Penetration and Fixation.
Drive the rivet through the letter and the base material from the front, ensuring the back of the rivet base lies flush against the surface to maintain a perfectly vertical, non-skewed alignment.
Step 3: Hammer to set the shape.
Use a single, targeted hammer strike with even, brief force to avoid repeated hammering, which can cause the leather to wrinkle or the letters to deform. Finally, sand the surface smooth to round off the edges of the rivets formed by compression on the back, preventing them from snagging clothing or scratching the skin.
Screw and Nut Fastening Installation Process (High-End Invisible Style)
Designed for high-end genuine leather bags and luxury ready-to-wear custom garments, this method ensures the finished product is smooth and seamless on both the front and back, with a premium texture. It also allows for disassembly and replacement, supporting customized design requirements.
First, drill precise holes using a precision hole punch selected according to the screw specifications. The hole diameter must strictly match the screw diameter, with an error margin controlled within 0.05 mm to ensure a precise fit. Place the metal letter on the front, insert the custom micro-screw, and lightly tighten the nut on the back to pre-secure it, then fine-tune the letter’s position and flatness.
Once properly aligned, use a micro-wrench to tighten evenly with moderate force, avoiding excessive pressure that could cause the leather to crack or the fabric to deform. Finally, trim the excess screw ends and sand them smooth to achieve a completely flat, seamless finish.
Adhesive Bonding Installation Process (Non-Destructive Decorative Version)
Suitable for lightweight knits, silk, premium genuine leather, and coated fabrics. Its core advantages include zero perforation and no damage to the material’s texture, preserving the product’s integrity to the greatest extent possible.
Preliminary substrate preparation is crucial. Wipe the bonding area with an alcohol swab to remove dust, oils, and wax, ensuring the surface is dry and clean to prevent adhesive failure later on. For the self-adhesive version, simply peel off the release paper. After precise alignment, press down vertically for at least 30 seconds to expel air from beneath the application, preventing bubbles and curling edges.
For the liquid adhesive version, use a neutral adhesive specifically designed for leather. Apply a thin, dotted layer along the edges of the lettering on the back; do not allow excess adhesive to spill onto the fabric. After application, apply pressure and let it sit for 24 hours to fully cure. Do not bend, wash, or rub the area before curing to ensure the bond remains stable.
Magnetic Attachment Installation Process (Reversible, Damage-Free Version)
Ideal for high-value ready-to-wear garments, limited-edition leather goods, and temporary design modifications. Can be repeatedly removed and replaced without leaving any puncture marks or damaging the base material.
The installation process is extremely simple: place the magnetic lettering piece on the front, align the matching magnetic backing plate on the corresponding spot on the reverse side, and press lightly to automatically snap them into place. After installation, gently pull to test the fastening strength; it remains completely secure for everyday wear. If you wish to change the design, simply remove it—perfect for adapting to a variety of styling needs.
The Logic Behind Selecting Fastening Methods from a Designer’s Perspective
Core Principles for Selecting Fastening Methods: Based on the properties of the substrate, centered on the product’s application scenario, and guided by design aesthetics; balancing strength, aesthetics, cost, and manufacturability; and avoiding a one-size-fits-all approach.
Selecting Based on Base Material
Genuine leather’s high flexibility and sufficient thickness make it compatible with the vast majority of manufacturing processes. Manufacturers prefer solid rivets for heavy-duty luggage because they are sturdy and durable. For light luxury leather bags, they favor screws and nuts to achieve a seamless, high-end finish. For thin genuine leather accessories, they can use high-quality adhesive bonding, which avoids damaging the grain by eliminating the need for hole punching.
PU leather and synthetic leather are prone to cracking and aging; heavy-duty rivet techniques are not recommended. Lightweight and thin PU fabrics are suitable for adhesive bonding or magnetic fasteners, while medium-to-thick PU can use lightweight claw nails to avoid damage to the base material caused by heavy hammering.
Knitted, woven, and lightweight garment fabrics are soft and prone to deformation; riveting is strictly prohibited, as it can lead to issues such as enlarged holes, fabric tears, and crooked lettering. Prioritize non-destructive methods such as adhesive bonding or magnetic fasteners to ensure fabric integrity and a smooth finished product.
Selecting Products Based on Usage Scenarios
For products subject to frequent use and outdoor wear and tear—such as work bags, commuter leather goods, and outdoor apparel—mechanical fastening methods should be prioritized. Solid rivets and claw nails are resistant to washing, friction, and bending, offering a long service life and making them well-suited for daily scenarios involving high-frequency wear and tear.
For decorative, low-frequency-use products—such as formal wear, affordable luxury accessories, and exhibition samples—the focus is on aesthetics and non-destructive results. Manufacturers choose adhesive bonding and magnetic fastening because they preserve the material’s natural texture and boost the product’s refinement.
Designers prefer screws, nuts, and magnetic fasteners for customized and iterable products—such as high-end bespoke leather goods and seasonal apparel These allow for the removal, replacement, and refurbishment of lettering, enhancing product reusability and meeting the needs of niche custom design requests.
Selecting Designs Based on Aesthetics and Details
A minimalist, seamless design style that prioritizes a smooth, flat surface on both sides without any protrusions. It primarily uses screws and nuts along with seamless adhesive techniques, eliminating visible stitching or rivet protrusions to create a clean, sophisticated visual appearance that complements light luxury and minimalist designs.
Workwear-inspired retro design style: Deliberately preserves the texture of the craftsmanship. Options include exposed claw nails and solid rivets, utilizing the industrial texture of metal fasteners to echo workwear and streetwear aesthetics while enhancing the design’s sense of depth.
For versatile and adaptable styling that requires frequent changes to decorative elements, magnetic attachment is the optimal choice. It allows for the free switching of lettering styles without damaging the product itself, catering to personalized styling and customization needs.
Selection Based on Cost and Mass Production Feasibility
For mass-produced products at competitive prices, prioritize claw rivets and standard adhesive processes, which are simple to operate, highly efficient, and cost-effective. These methods work well for large-scale assembly line production and tolerate a high margin of error.
For mid- to high-end mass-produced products and niche custom items, select solid rivets and precision screw processes. These methods offer high manufacturing precision, strong product stability, and outstanding attention to detail and texture, making them well-suited for the pricing and positioning of mid- to high-end products.
Conclusion
Designers often overlook the attachment techniques for metal lettering logos, yet these techniques play a crucial role in determining the final texture and quality of apparel and leather goods. For designers, a thorough understanding of the technical differences among various attachment methods, their appropriate applications, and key implementation considerations can effectively prevent manufacturing defects and strike a balance between aesthetics, functionality, and practicality.
From the refined, seamless appearance of non-destructive adhesive bonding and magnetic attachment, to the sturdy durability of claw fasteners and rivets, to the high-end, customizable options offered by screw fastening—each technique has its own specific application scenarios. Only by precisely matching materials, contexts, and design styles can metal lettering truly enhance product design, elevate the product’s quality, and boost its market competitiveness.